LEGO bricks-Fun for all ages
February 15, 2015 - 4:15pm — zulma
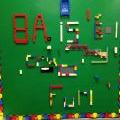
From an early age, LEGO bricks provide a foundation for creative building and engineering skills. Children of all ages enjoy the many different possibilities that LEGO brings.
As a brand new 8th Grade homeroom teacher, I wanted to bring the option of LEGO bricks to my student’s unstructured time, but space became a limitation with 30 middle school bodies in my somewhat cramped classroom. Earlier in the year I met a teacher at an EdCamp who talked about building a LEGO wall in her room and I decided to look into that as a possibility. After exploring the available options in my classroom, I decided to turn one of my little-used bulletin boards into a LEGO board where my students could build and design. Once that was determined, I quickly moved forward with my project!
Materials:
- 16 LEGO (10 inch by 10) inch Green Base plates
- ¾-inch thick plywood, 44 inches wide and 44 inches long
- Liquid nails and dispensing gun
- Tapcon 3/16 x 1-¼ inch concrete anchors
- Ruler
- Power drill
- Lego
- Measure the area available for the board (in my case, 44 inches x 44 inches)
- Purchased ¾-inch thick plywood, cut to size at Home Depot.
- Ordered 16 LEGO green base plates (10 inches X 10 inches) from LEGO. Back in October I paid $4.99 directly from LEGO, their price appears to have gone up http://shop.lego.com/en-CA/Green-Baseplate-10700. Amazon and eBay could be alternative options.
- Measured, placed and marked baseplate locations on the board. I allowed for a two-inch margin along all four edges of the board. I also made sure all of the tiny LEGO words were oriented in the same direction!
- I used Liquid Nails to glue each base plate to the board.
- I applied glue along the perimeter and an “X” in the middle of each plate.
- As I glued down each base plate, I used a LEGO piece to connect the new plate with an old one to be sure the spacing and alignment were correct.
- I allowed the glue to dry overnight.
- Because the wall behind my old bulletin board is concrete, we used Tapcon concrete screws to secure the board assembly to the wall.
- My son Brooks drilled along the edge of the plywood and also placed a screw at the center of the board.
- After confirming the strength of the installation, the LEGO board was ready for my student’s creative enjoyment!